Auto Update Sophos UTM with Microsoft Endpoints

Office 365 needs some IPs and URLs to be directly accessed without a proxy. Automate this with SophosEndpoints.
In this article we will cover the following points:
- Configure Sophos UTM (enable RESTful Api & add local user)
- Install SophosEndpoints
- How to use SophosEndpoints
- Configure AD for Group Managed Service Accounts
- Create scheduled task for automation
Configure Sophos UTM
In order to use the SophosEndpoints Module we have to enable the RESTful API and create a new API key mapped to a local user:
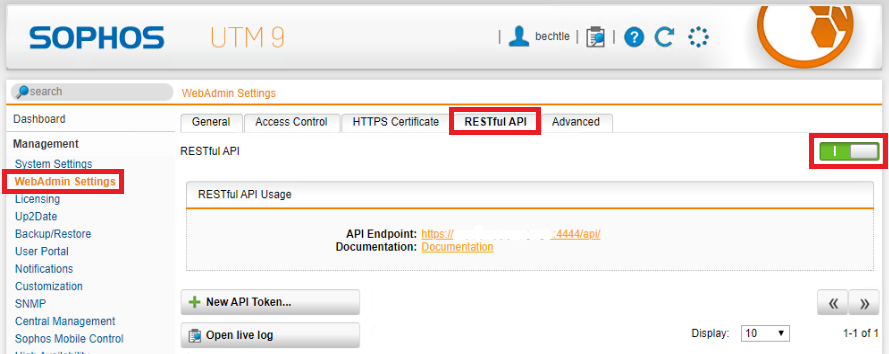
- Login to the WebAdmin GUI
- Go to Management > WebAdmin Settings > RESTful API
- Activate Enable RESTful API
Take a note of the URL of the API Endpoint (without the trailing slash), you are going to need this later.
To generate an API token, perform the following steps:
- Login to the WebAdmin GUI
- Go to Management > WebAdmin Settings > RESTful API > New API Token
- Map the token to a local Sophos UTM user (not an AD integrated account)
- (Optionally) under Advanced Settings create a whitelist with the IP of the machine you are going to use to run the scheduled task on.
- Click Save
Take a note of the API token, you are going to need this later.
If you don't have a local user account, create a new one:
- Login to the WebAdmin GUI
- Go to Management > Definitions & Users > Users & Groups
- Click on New User… and set Authentication to Local
The user must have administrative permissions.
Install SophosEndpoints
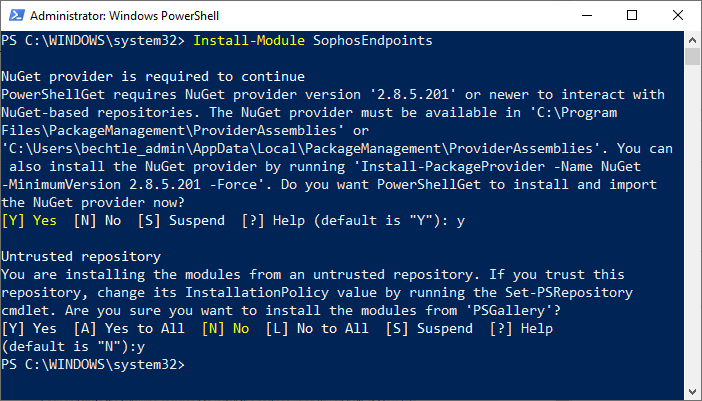
The SophosEndpoints Module can be installed from PowerShell Gallery. Open an elevated PowerShell on the machine you are going to create the scheduled task on. Run the following cmdlet.
Install-Module SophosEndpoints
Alternatively you can download SophosEndpoints from GitHub, unprotect the downloaded zip file and copy the SophosEndpoints folder to a folder in your PowerShell Path environment.
How to use SophosEndpoints
After installing the module you can use the cmdlet Set-EndpointsInUtm to update IPs and URLs used by Microsoft directly in Sophos UTM.
The most important parameters you are going to use are:
UtmApiUrl: This is the URL of the API Endpoint (without the trailing slash) and tells the cmdlet how to contact Sophos UTM.
Example value: https://sophos.testlab.live:4444/api
Default value (if you omit the parameter): https://sophos:4444/api
UtmApiKey: This is the API token we just created. This is needed to authenticate against Sophos UTM.
Example value: jHjhasjkhjhHUmqoPasdqN
TenantName: This is the name of your Office 365 tenant. It is the first part of your .onmicrosoft.com address. E. g. testlab.onmicrosoft.com. This is needed to customize some URLs like testlab.sharepoint.com
Example value: testlab
Default value: null
UtmIpPrefix: This is the prefix that is added to every network that is created by the Set-EndpointsInUtm. This should be unique, as this is used to identify the autocreated networks.
Example value: “Office 365 Endpoint”
Default value: “Microsoft365 Net”
UtmExceptionPrefix: This is the prefix that is added to every exceptionthat is created by the Set-EndpointsInUtm. This should be unique, as this is used to identify the autocreated exceptions.
Example value: “Office 365 Exception”
Default value: “Microsoft365 Exception”
UtmExceptionDisabledChecks: This is an array of strings that represent the checks, that are skipped in the web protection exception. Possible values can contain: ‘av’, ‘cache’, ‘certcheck’, ‘certdate’, ‘check_max_download’, ‘content_removal’, ‘contenttype_blacklist’, ‘extensions’, ‘log_access’, ‘log_blocked’, ‘patience’, ‘ssl_scanning’, ‘url_filter’, ‘user_auth’
Example value: @{‘av’, ‘ssl_scanning’}
Default value: @{‘sslscanning’, ‘user_auth’}
LogFilePath: The Path to a logfile.
Example value: “C:\logs\SophosEndpoints.log”
Default value: null
Typically you would execute the following in PowerShell:
Set-EndpointsInUtm -UtmApiUrl "https://sophos.testlab.live:4444/api" -UtmApiKey "kjAHGansdzyPdsYhmILKgOWsh" -TenantName testlab -LogFilePath "Set-EndpointsInUtm.log"
Another example would be:
Set-EndpointsInUtm -UtmIpPrefix "O365 Network" -UtmExceptionPrefix "O365 Exception" -UtmApiUrl "https://sophos.testlab.live:4444/api" -UtmApiKey "kjAHGansdzyPdsYhmILKgOWsh"
If you want to know more about additional parameters and settings run the following cmdlet:
Get-Help Set-EndpointsInUtm -full
Configure AD for Group Managed Service Accounts
In order to create a scheduled task that is not bound to your user account and automatically changes its password, we use a group managed service account (gMSA). This is much more safe and better to maintenance than your ordinary user account. If you haven't done so already we must first create a KDS Root Key (once per AD forest):
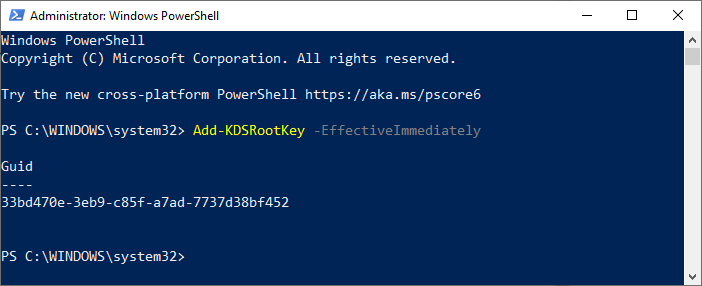
On your Domain Controller - or Adminbox with the ActiveDirectory PowerShell Module installed - open an elevated PowerShell and run the folowing cmdlet:
Add-KDSRootKey –EffectiveImmediately
This takes up to 10 hours to replicate, so be patient - the security gain is worth the wait ;-)
If you are in a test environment (and only then!) you can run Add-KdsRootKey –EffectiveTime ((get-date).addhours(-10)) to create the key without waiting for replication.
Meanwhile we can create a global security group in AD and add the computer objects as members which will be allowed to use the gMSA. In our case the machines which will run the scheduled task. I created a group called SophosMaintainer and added the computer Adminbox as member.
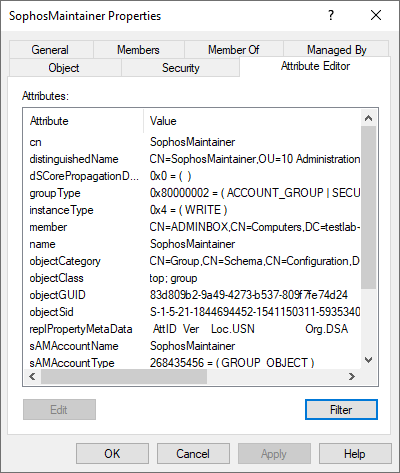
You should restart the machines you added to the group, because group membership is evaluated at startup. Otherwise you won't be able to add the gMSA later on.
Now it is time to create the gMSA. On a DC open an elevated PowerShell and run the New-ADServiceAccount cmdlet. You have to specify a name (this is the sAMAccountName of the gMSA), an DNSHostName (this is the fqdn that the gMSA will be available under), the PrincipalsAllowedToRetrieveManagedPassword (this is the group we just created) and optionally some ServicePrincipalNames. In my testlab environment this is the cmdlet I used.
New-ADServiceAccount -name updateSophos -DNSHostName updateSophos.testlab.live -PrincipalsAllowedToRetrieveManagedPassword SophosMaintainer

Next we can install the gMSA on the machine we want to configure the scheduled task. Open an elevated PowerShell on that machine and run the following cmdlets:
Install-AdServiceAccount updateSophos

Test-AdServiceAccount updateSophos

That's it, we successfully installed a group managed service account. In the next step we are configuring a scheduled task that runs in the context of this gMSA. In order to run the SophosEndpoints PowerShell the gMSA does not need any special permissions. However if you want to enable logging, you have to grant the gMSA permission to write to the folder in which you want to store the logfile. The gMSA can be referenced as a service account with name testlab\updateSophos$
Create scheduled task for automation
The last step is to create a scheduled task to automate the setting of networks and web protection exception for the Sophos UTM. As we are using a gMSA for the scheduled task we can't create a task using the GUI. We have to do this in PowerShell.
In order to create the task we have to define the action, trigger and principal of the scheduled task. In the action we are going to run a PowerShell script that executes the Set-EndpointsInUtm cmdlet. You should adapt this as explained in the section How to use SophosEndpoints. The trigger defines when the scheduled task will be run and the principal is the account used to execute the task. This is the gMSA we just created.
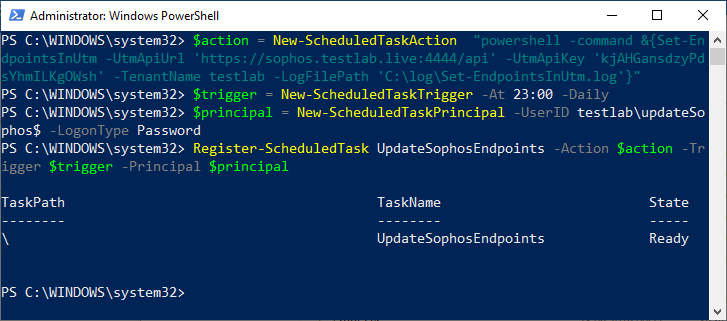
$action = New-ScheduledTaskAction  "powershell -ExecutionPolicy Bypass -File C:\scripts\runSophosEndpoints.ps1

$trigger = New-ScheduledTaskTrigger -At 23:00 -Daily

$principal = New-ScheduledTaskPrincipal -UserID testlab\updateSophos$ -LogonType Password
The content of C:\scripts\runSophosEndpoints.ps1 is in my testlab the following:
Set-EndpointsInUtm -UtmApiUrl 'https://sophos.testlab.live:4444/api' -UtmApiKey 'kjAHGansdzyPdsYhmILKgOWsh' -TenantName testlab -LogFilePath 'C:\log\Set-EndpointsInUtm.log'
To create the scheduled task with these parameters run the following cmdlet.
Register-ScheduledTask UpdateSophosEndpoints –Action $action –Trigger $trigger –Principal $principal
After the first run you should check the status of the scheduled task. If you specified a LogFilePath you should also check the logs.
That's it, we don't have to worry about manually updating definitions for Office 365 anymore. The most current IPs and URLs used by Microsoft are automatically imported into Sophos UTM!